Chocolate peanut butter pavlova and the basics

The first time I tasted Pavlova was on our honeymoon in New Zealand. We were floating in a small boat on Doubtful Sound. It was a peaceful evening as we settled at the communal tables with the other travelers. Surrounded by nothing but the quietness of nature and the deep darkness of night it was one of the most magical experiences I’ve ever had.
Milford Sound afternoon
Photo by Peter Hammer on Unsplash

And that pavlova was one of the most magical things I’ve ever eaten. A crunchy beautiful cloud topped with cream and fruit. From afar it might just look like a big meringue with toppings, but a great pavlova is so much more.

When we got back I started researching how to make it, top it, and serve it. That was in 2009 so there wasn’t a lot online about how to perfectly make this delicate dessert. So I reached out to a friend from New Zealand to see what she could tell me.
Pavlova is a key part of traditions in both Australia and New Zealand, especially around the holidays. Many families enjoy it at Christmas which is summer for them. My mind is already spinning with ideas for a wintery pavlova. But back to my friend and her recipe.
She was nice enough to share her recipes with me and tell me about how her family traditionally served pavlova. Whether making a large platter size version or individual clouds they should come out with a crunchy shell and a marshmallowy center.
pavlova
The key to getting this combination of textures is letting your pavlova cool slowly. Once it is done cooking you simply turn the oven off and leave the pavlova in the oven as it cools down. If you peek you risk making the clouds deflate. A flat pavlova is not fun at all.
As for toppings, most people serve them with homemade whipped topping, fruits, and maybe a drizzle of chocolate or fruit sauce. But really you can top it with whatever you fancy. Just a few ideas to get you going:
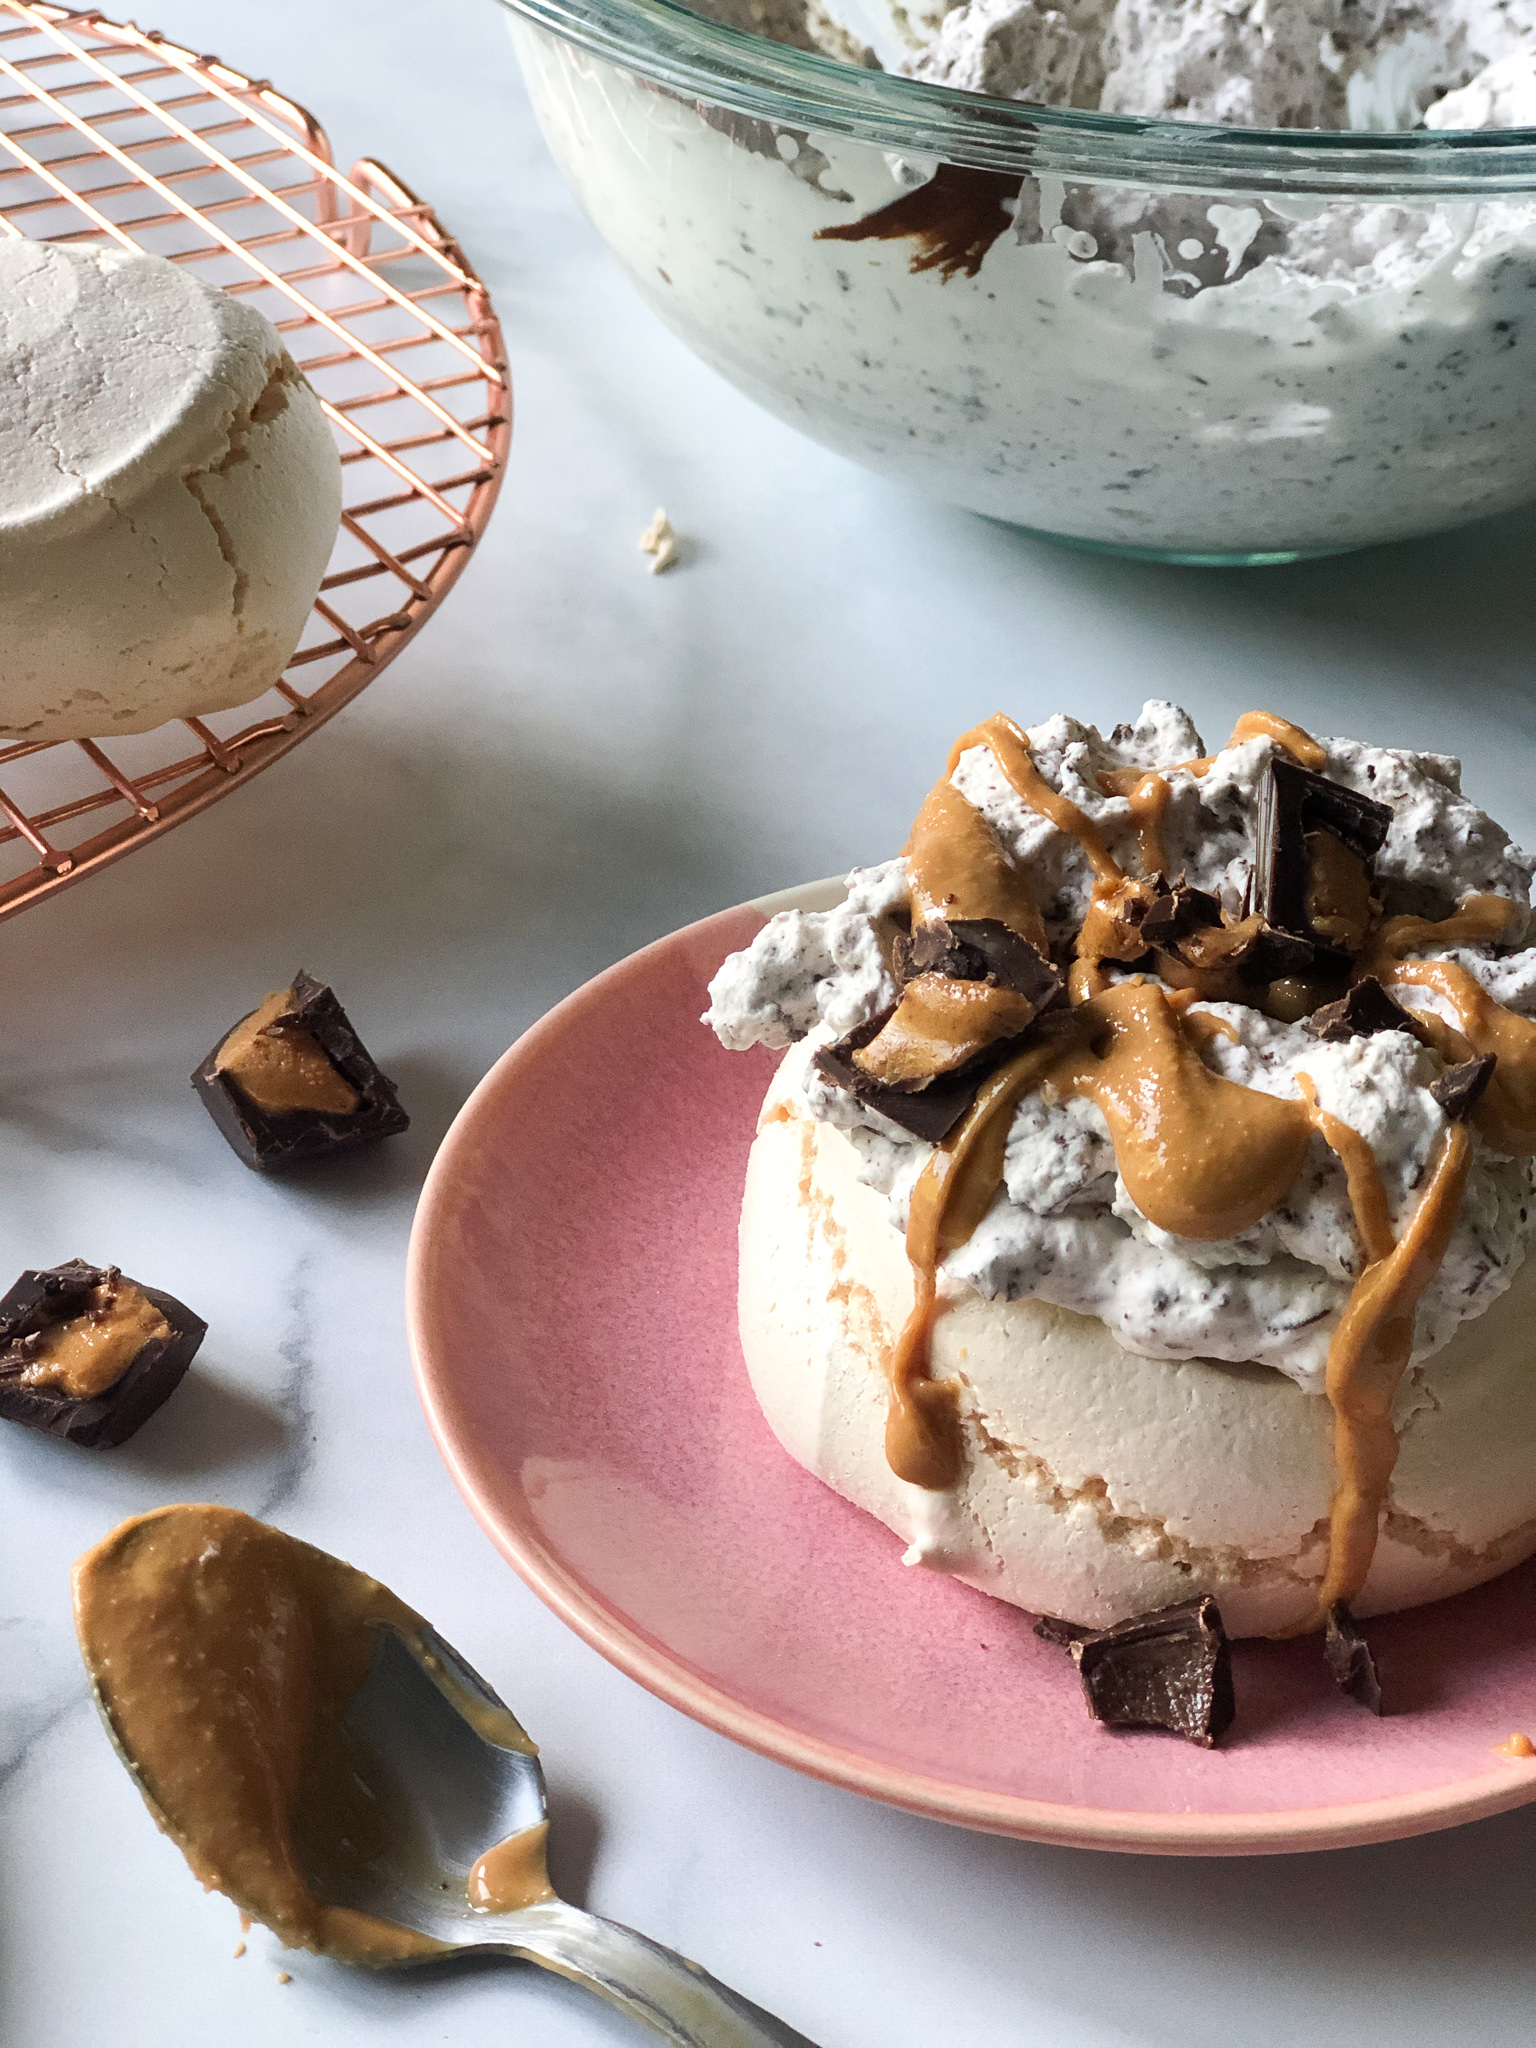
  • Whipped cream with melted, cooled chocolate swirled in and topped with a drizzle of peanut butter and chopped up peanut butter cups – our current favorite!
  • Lavendar infused whipped cream topped with fresh blueberries and a drizzle of lemon curd
  • Classic whipped cream topped with fresh raspberries and drizzled with melted chocolate
If you decide to add something to your whipped cream just make sure it is at room temp or cooler.
As for size, we make it in individual servings so we can save some of the meringues for later. If you top it you can’t really save it so we don’t usually make a large one unless we are hosting a group of people. Just remember the size of your pavlova will affect your bake time. Usually larger pavlovas take closer to 90 minutes while smaller ones take around 45 minutes. However you decide to it, just remember not to peek too much.
Here is our current favorite recipe. You can use the pavlova base and whipped cream recipe to dream up your own combinations. Have fun and enjoy a sweet little taste of the South Pacific.
Print
clock clock iconcutlery cutlery iconflag flag iconfolder folder iconinstagram instagram iconpinterest pinterest iconfacebook facebook iconprint print iconsquares squares iconheart heart iconheart solid heart solid icon
pavlova up close

Chocolate Peanut Butter Pavlova

  • Author: Ashley Robinson
  • Prep Time: 20 minutes
  • Cook Time: 45 minutes
  • Total Time: 1 hour 5 minutes
  • Yield: 6-8 pavlovas 1x
  • Category: Dessert
  • Method: Baking
  • Cuisine: South Pacific

Description

The beauty of pavlova is how many different ways you can prepare it by simply switching up the toppings. We took this South Pacific treat and put an American spin on it with chocolate and peanut butter toppings for a special anniversary treat. Get creative using the meringue base and the whipped cream as your starting point.


Ingredients

Scale

Pavlovas

  • 3 egg whites, room temperature
  • 1 cup superfine sugar
  • 1 tsp white wine vinegar
  • 1 tsp cornstarch
  • 1/2 tsp vanilla extract

Toppings

  • 8oz heavy whipping cream
  • 1/2 cup melted chocolate, cooled to room temp
  • 1/2 cup smooth natural peanut butter
  • 1012 mini peanut butter cups (I use the dark chocolate Justin’s cups)

Instructions

  1. Preheat the oven 225 degrees F.
  2. Line a baking sheet with parchment paper and set aside.
  3. In a clean and dry bowl of a stand mixer add the egg whites and beat on medium until soft peaks begin to form.
  4. With the mixer still running, gradually add the sugar and beat until it is all incorporated and the mixture becomes thick and glossy, about 10 minutes.
  5. Remove the bowl from the stand mixer and using a metal spoon gently fold in the vinegar, cornstarch, and vanilla.
  6. Spoon the pavlova mixture onto the prepared bake shit making 6-8 individual pavlovas. You can also pipe it for a more decorative cloud. Make a small indention in the center of each so you have a place to put your toppings.
  7. Bake for 40-45 minutes in a preheated oven until the outside is crisp. Turn the oven off and let the pavlovas cool in the oven for several hours until completely cool.
  8. When you are ready to serve whip the heavy cream using a hand mixer until thick and soft peaks form. This usually takes 5-10 minutes. Gently stir in the cooled melted chocolate or continue to whip it in using the hand mixer.
  9. Top each pavlova with whipped cream, a drizzle of peanut butter, and chopped up peanut butter cups.
  10. Enjoy!

Notes

If you don’t want to worry about melting chocolate, feel free to use your favorite chocolate syrup or stir in mini chocolate chips.

If your peanut butter isn’t drippy enough to drizzle or spoon on pop it in the microwave for about 20 seconds.

About The Author